Firewalls have different ports that allow different services to access your server. There's a detailed explanation of firewalls and ports in Opening and Closing Firewall Ports. Certain services typically run on certain ports. For instance, Secure Shell (SSH) typically runs on port 22. But this predictability makes servers more vulnerable. Malicious programs and people can exploit common ports, especially if a server user has a weak password.
A quick and simple way to avoid some attackers is to change the port you use for SSH. This won't prevent attacks that are directed specifically at your server, but it will help if malicious programs are scanning port 22 for information: the information won't be there!
You change the SSH port via command line. The process involves
- Opening Your New Port in CSF
- Editing the SSH Configuration File
- Closing Port 22
- Reporting Your New SSH Port
If you've used a terminal to log into your server, you'll be able to change your SSH port.
Opening Your New Port in CSF
You must open your new firewall port before you edit your SSH configuration files. This ensures you aren't locked out of your server while you're making these changes. Follow these instructions for adding your new SSH port to your firewall. If you have a hardware firewall, please contact our Support team so we can make the changes to your hardware.
- Log into WHM. You can log into WHM from your account in the AlpineWeb Customer Backroom or by going to:
https://www.my-web-site.com/whm
Remember to replace https://www.my-web-site.com with your domain name. - Locate ConfigServer Security & Firewall under Plugins in the left-hand navigation. Or, search for “Firewall” in the search bar. Then, click on ConfigServer Security & Firewall.
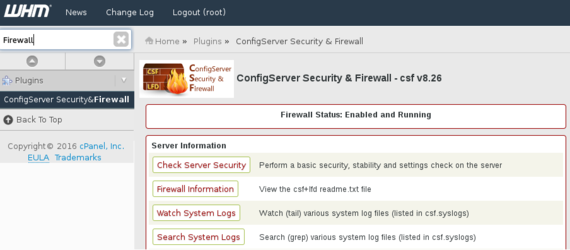
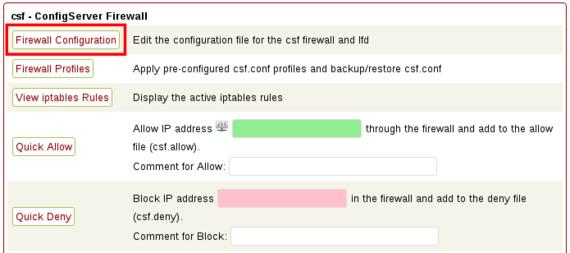
- Scroll down to csf – ConfigServer Firewall and click on Firewall Configuration. This page has all the settings for CSF. This is exactly the same file you'd see if you use the command line interface to edit this configuration file, but laid out graphically.
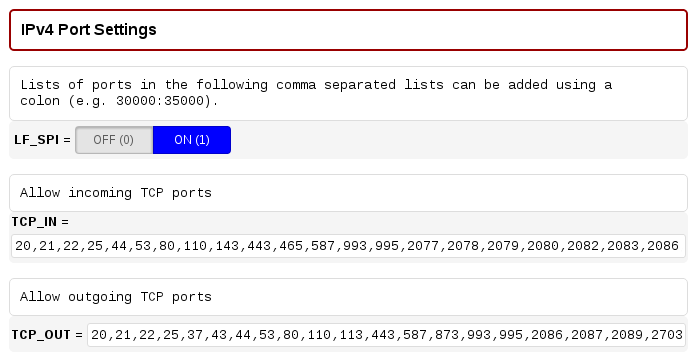
- Scroll down to IPv4 Port Settings.
- The important settings are TCP_IN and TCP_OUT.
- Add your new SSH port number to TCP_IN to allow incoming traffic on that port.
- Add your new SSH port number to TCP_OUT to allow outgoing traffic through that port.
- Add your new SSH port number to TCP_IN to allow incoming traffic on that port.
- Once you've added your port, scroll all the way to the bottom of the page and click Change.
- Your changes will be confirmed, and the last step is to restart your firewall to put your changes into action. Click Restart csf+ltd.
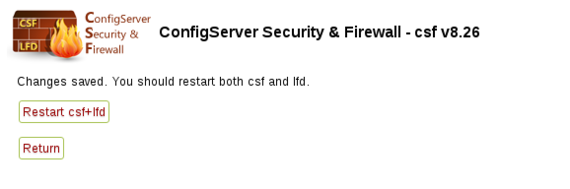
- CSF will restart and the changes you made will be live. You can click Return at the bottom of the page to go back to the main CSF configuration page.
Editing the SSH Configuration File
- SSH into your server. If you haven't SSH'd into your server before, read Logging into Your Server via Secure Shell (SSH) first.
- The SSH configuration file is called sshd_config and is located at:
/etc/ssh/sshd_config
Create a backup of this file by using the cp command to copy the file's contents into a new file. Type:
cp /etc/ssh/ssh_config /etc/ssh/ssh_config_backup
Check Your WorkLook in the ssh directory to see if your backup file and your original file are both there:
cd /etc/ssh
then,ll
You'll see both the sshd_config file and the sshd_config_backup
- Now that you have a backup file, you need to open the sshd_config file in a text editor. Let's use the Vim editor. Type:
vim /etc/ssh/sshd_config
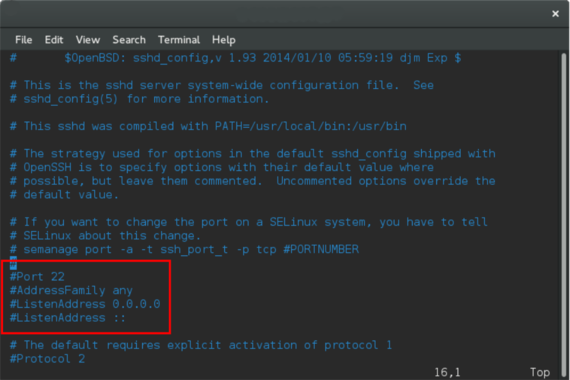
- You'll see the configuration file open on your screen. Using you keyboard's arrow keys, find the port setting. If your port is 22, the port setting will have a # at the beginning of the line. This turns the line into a comment: your server will ignore anything on that line.
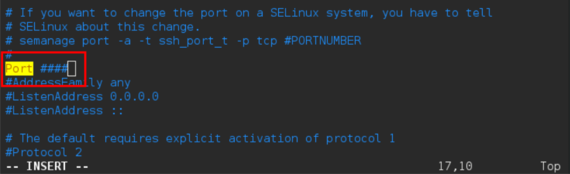
- Press i to start inserting text. Then, remove the # in front of the port and change the number 22 to the port number you want to use for SSH.
Choosing an SSH Port: Make sure you don't pick a port number that another service uses. Check Wikipedia's list of port numbers and their uses. Then, use a port number that isn't listed.
- When you're done editing your file, press the Esc key to stop inserting text, then type:
:wq
to write (save) your changes and quit the file. - Now, you'll restart the SSH service. If you have a CentOS 7 server, use this command
systemctl restart sshd
and press Enter. If you have a server older than CentOS 7, use the command
service sshd restart
and press Enter.
Closing Port 22
You've successfully changed your SSH port! Now, you can safely close port 22 in your firewall. It's best practice to close ports you aren't using. Follow these instructions for adding your new SSH port to your firewall (Opening and Closing Firewall Ports). If you have a hardware firewall, please contact our Support team so we can make the changes to your hardware.
- Log into WHM. You can log into WHM through your account in the AlpineWeb Customer Backroom or by going to:
https://www.my-web-site.com/whm
Remember to replace https://www.my-web-site.com with your domain name. - ConfigServer Security & Firewall is under Plugins in the left-hand navigation. Or, search for “Firewall” in the search bar. Then, click on ConfigServer Security & Firewall.
- Scroll down to csf – ConfigServer Firewall and click on Firewall Configuration. This page has all the settings for CSF. This is exactly the same file you'd see if you use the command line interface to edit this configuration file, but laid out grapically.
- Scroll down to IPv4 Port Settings.
- The important settings are TCP_IN and TCP_OUT.
- Remove "22" from TCP_IN to deny incoming traffic on that port.
- Remove "22" from TCP_OUT to deny outgoing traffic through that port.
Separate ports with a comma, but don't use spaces. - Remove "22" from TCP_IN to deny incoming traffic on that port.
- Once you've removed port 22, scroll all the way to the bottom of the page and click Change.
- Your changes will be confirmed, and the last step is to restart your firewall to put your changes into action. Click Restart csf+ltd.
- CSF will restart and the changes you made will be live. You can click Return at the bottom of the page to go back to the main CSF configuration page.
Now, when you SSH into your server, you'll type in:
ssh root@youripaddress -p##
You'll replace "youripaddress" with your server's IP address and "##" with your new SSH port. Logging in with:
ssh root@youripaddress
will no longer work. If you have any problems with your server, AlpineWeb will need your new SSH port to log into your server to help you.
Reporting Your New SSH Port
If you change your SSH port, log into your AlpineWeb account and securely tell AlpineWeb your new SSH port.
- Log into your AlpineWeb account in the
AlpineWeb Customer Backroom - Once logged in, click on the Manage Account Details.
- Next, scroll down and locate the SSH Port field.
- Then, type in your new SSH port into the SSH Port field.
- Click Save Settings.
AlpineWeb takes your security very seriously. We only log into your server when you need help and we've authenticated your identity.
